Showing posts with label dessert. Show all posts

Sunday, April 3, 2011

Fruit bouquet


I was recently inspired by Edible Arrangements to do a little fruit art of my own. This was a super fun, although time consuming process. A few people have asked about it - so here's the step-by-step.

Start with a flower pot and some floral foam:


For about 50 skewers of fruit, I used a pineapple, a cantaloupe, one green apple, a small bunch of red grapes, and 2 pounds of strawberries.

I cut some cantaloupe wedges to look similar to apple slices and skewered them from the tip into the heart of each slice:


Grapes were stacked three to a skewer:


The pineapple was cut using a flower-shaped cookie cutter. I had to use a small piece of melon rind to secure the pineapple flower so it didn't slide down the skewer. Alternatively, you can cut your pineapple so that the core (which is firmer) is in the center of the flower and skewer it that way:


Place a ball of melon on top after skewering on the pineapple flower. You'll want to use skewers of varying lengths to create the bouquet effect.

Getting started:

The strawberries were easy - just stick a skewer in through the stem until it doesn't quite push out the tip.


Any of the fruit can be dipped in chocolate, but this is more time consuming. I would budget 1 to 2 hours for a regular fruit bouquet and 2-3 hours for one with a lot of chocolate dipped fruit. The ingredients will run around $15 to $20. But they sell for $60 to $100 to if you enjoy the effort, it's a great money-saver! I think this would be a fun project to do with a friend.


Just pack as many in there as the floral foam will hold!


The chocolate dipped version:

To finish off, use some parsley to fill in the gaps and cover up the sticks a little bit.

Monday, March 7, 2011

Oranges, Part II

Lest you think I'm really odd for posting a recipe for candied citrus peel in March (it's a Christmas treat, after all)... There was a reason. It looks like this:

finished, take 1

This particular recipe adventure didn't even start out with a desire to make candied citrus peel -- it started with the cake. You see, this cake has two entire oranges in it. Yes, the WHOLE orange, pith, peel and all. So naturally, I had to see if this really could be done.

And what is a cake without a little decoration? Enter the candied citrus peel.  Now if I could just figure out what to do with all of the naked oranges in my fridge...

The verdict: yes, you really can make a cake out of whole oranges. Despite numerous warnings from other websites that this cake only works if you boil your oranges for hours first, this cake wasn't bitter at all. In fact, it was delicious--rich and buttery, thanks to a few key ingredients:

Round thingsDSC_0099

Three eggs, three sticks of butter, two cups of sugar -- how could that not be good!?


Whole Orange Bundt Cake with Chocolate Ganache Glaze
from Alejandra Ramos of "Always Order Dessert"
Ingredients
2 whole oranges, scrubbed and washed well
1 1/2 cups butter, softened
2 cups granulated white sugar
3 large eggs, room temperature
1 tablespoon pure vanilla extract
3 cups all purpose flour
3 teaspoons baking powder
1 teaspoon Kosher salt

DSC_0090batterfloured bundtready to bake

1. Preheat oven to 350 degrees. Generously grease and flour a Bundt pan and set aside.
2. Quarter the oranges, remove any seeds if not using navel, and put in food processor to puree. Set aside.
3. While the oranges are pureeing, cream the butter and sugar together in the base of an electric mixer for 5 minutes until light and fluffy. Add the eggs, one at a time, waiting until each is fully combined.  Add the orange puree and vanilla extract and mix until combined.
4. In a separate bowl, whisk together the flour, baking powder, and salt. Mix into the wet ingredients gently, just until fully combined.
5. Pour the cake batter into the prepared Bundt pan, spreading so that it is evenly distributed. Bake at 350 for about 60 minutes or until a tester inserted in the cake comes out clean. Let cool in the pan for 15 minutes before inverting onto a wire rack to cool. Cool completely before frosting:

fresh out of the ovenready for frosting!

Chocolate Ganache Glaze

Ingredients (the original recipe called for twice this amount -- I used 3/4 of the original recipe, and had leftovers... I think this amount should be sufficient)
1/2 cup heavy cream
1 cup chocolate chips -- I highly recommend Ghiradelli's 60% Cacao chocolate chips

Put the chocolate chips in a small heat proof bowl. Heat the heavy cream over medium heat just until small bubbles begin to form. Pour the hot cream over the chocolate chips, let sit for 30 seconds, and then and whisk gently until fully melted and combined. Let cool for 15 minutes. Slowly pour the ganache over the cake in a circular motion, allow it it slide drip down the sides. Try to refrain from spreading it around with a spatula, and work quickly. It may take a few tries to get a smooth ganache -- but don't worry, it'll taste so good no one will notice the imperfections!

Top with candied orange peels -- let the ganache set for 15 minutes, then press in the peels gently. Let the glazed cake set for at least an hour before serving. It will keep for 3-5 days under plastic wrap.

frosted, take 2
finished, take 2

Sunday, March 6, 2011

Oranges, Part I

DSC_0010

Candied Orange Peels
(mostly) from David Lebovitz' "The Perfect Scoop"

2 large oranges (or citrus fruit of your choice), washed and scrubbed well
1 cup water
1/2 cup granulated sugar, plus extra for coating
2 teaspoons light corn syrup
pinch of salt

1. Remove strips of orange peel with a knife or vegetable peeler. Cut from pole to pole, creating long straight strips and trying to keep edges as smooth as possible. Gently scrape most of the white pith off of each peel (depending on how think you want your strips to be -- my first batch was too thin and became very brittle. Cut the peel into 1/8 inch match sticks (for curls) or into larger pieces for chunks.
2. Place the peels in a sauce pan and cover with an inch of water. Bring to a boil and simmer gently for 5 minutes. Drain and rinse well. Repeat this process twice more, using fresh water each time. This step helps remove the bitter taste from your orange peels. Some recipes recommend boiling for up to an hour, but I found 15 minutes to be sufficient.
3. Combine 1 cup water, 1/2 cup sugar, corn syrup, and salt in a non-reactive saucepan. Bring to a boil and add the blanched orange peel. Simmer as slowly as possible until the syrup reaches 230 degrees fahrenheit. This should take a good 20-30 minutes, if not longer. Watch the pot very carefully once your thermometer gets above 220. It will take a long time in the 212-220 range, and then reach 230 very quickly. I burnt my first batch because I wasn't watching it closely enough!
4. Let the peels cool in the syrup. You can then either store them in the syrup in the refrigerator, or you can sugar them. To sugar the peels, gently lift them out of the syrup with a fork, letting the excess syrup drain off. Separate the peels and lay them on wax paper. Let them dry out for 30 minutes. Toss the peels in granulated sugar, and let dry for another 30 minutes, or longer if they still feel sticky. Store in the refrigerator for up to 2 months. I also hear these are pretty fantastic dipped in dark chocolate.

DSC_0034DSC_0039DSC_0058DSC_0066


*Notes: I always recommend using a candy thermometer, as it takes the guess work out of cooking. They are very inexpensive and can be obtained at any cooking store, or even Walmart or Target. If you don't have one, however, just cook the peels until most of the syrup has boiled away and the peels look crystalized. The syrup will have just started to look foamy as it boils.

I also don't recommend halving this recipe unless you have a very small saucepan--use the same amount of syrup even if you have one orange. Otherwise there won't be enough syrup to cover the peels and you are in danger of it cooking too fast, or your thermometer not giving an accurate reading.

Apparently there is also great controversy over the *correct* way to make candied fruit. Some recipes claim it takes days to properly candy something, while others think it can be done in just an evening. Since I was experimenting anyway, I decided to try the quick method first, of course. It worked wonderfully! I do plan on trying the longer method at some point, though, for a proper scientific comparison. And of course, I'll have to test out a few more kinds of fruit... ;).  Have you tried candying anything? How did it turn out?

DSC_0002

Wednesday, November 3, 2010

Butterscotch Gingerbread Cookies

I call these my "tastes-like-fall" cookies and I like to make them at this time of year.

I got the recipe from a friend (shout out to Becca if you're reading this!) and I quickly adopted it as one of the more unique cookie recipes in my repertoire.


The recipe starts out with your basic cookie ingredients - butter, flour, sugar, eggs - and a few special ones - most notably molasses and butterscotch chips, along with some cinnamon, ginger, and cloves.

 Cream the butter and the sugar, beat in the wet ingredients, then stir in the dry ingredients... if you're a fellow cookie lover, you know the drill. When the dough comes together it looks something like this:

You'll have to excuse the lack of pictures for this cooking endeavor, but you would have difficulty remembering to take photos, too, if you had a half-naked urchin hanging on your oven incessantly asking "my have some, mama?"

So without further ado, here's the recipe if you want to give it a try:

Butterscotch Gingerbread Cookies

1 cup butter
1 1/2 cups brown sugar
1 egg
1/3 cup molasses
3 cups flour
2 tsp baking soda
1 1/2 tsp cinnamon
1 1/2 tsp ginger
3/4 tsp cloves
1/2 tsp salt
1 (11 oz) package butterscotch morsels

Cream butter and sugar, beat in egg and molasses until creamy. Mix dry ingredients in separate bowl; mix in. Add morsels. Bake on greased cookie sheet at 350 degrees for 9 to 11 minutes. Makes about 4 dozen.

Thursday, October 21, 2010

This post is not about pumpkins!

Don't get me wrong, I love fall (which has finally arrived in DC!!!).... but it seems that every time I check my blog feeds, someone else has posted a recipe using pumpkins. I love seasonal eating, but I think every now and then the fall internet world needs something not made out of squash.
So I made lemon bars! Everyone needs a little buttery, lemony, sugary goodness to round out their fall afternoons. (Of, course, if you're looking for pumpkin, I'd recommend trying these, or these... or these.)

Confession: I forgot to take a picture of the cut bars before they were gone. What can I say? They were really good...

Lemon Bars
A fair warning: This recipe contains a lot of eggs, butter, and sugar (Especially if you make 1 1/2 times the recipe, like I did -- I shared, I promise!). That is why it is sooooo good. Just run and extra mile tomorrow, and don't tell anyone you serve these to the caloric secret to their amazingness ;).

Crust:
1 1/2 cups all-purpose flour
6 tablespoons powdered sugar
3/4 cup butter

Filling:
4 eggs
2 cups of sugar
1/3 cup fresh-squeezed lemon juice (2-3 lemons)
zest from one lemon
1/4 cup all-purpose flour
1/2 teaspoon baking powder

1. Preheat oven to 350 degrees.
2. Combine crust ingredients and cut with a pastry blender until butter is in pea-sized clumps. Press crust evenly into the bottom of a 9x13 inch pan.
3. Bake crust for 20-25 minutes, until lightly browned.


4. While crust is baking, beat together eggs, sugar, lemon juice, and lemon zest with a wire whisk. Mix together flour and baking powder, then gently stir into egg mixture. The mixture should have just a thin layer of bubbles on top. This will give you the nice flakey crust on top of your bars, but be careful not to overmix it.

5. Pour filling over warm crust and return to the oven for 20-25 minutes until filling is set and edges are slightly brown.
6. Remove from oven and let cool for 10 mins. Sprinkle powdered sugar and lemon zest on top. When pan is cool enough to handle (but still warm), cut the bars. You can remove them from the pan or leave them in there for the rest of the cooling. 

Generally, you cool lemon bars before serving them. But sometimes I'm impatient and eat them while they are warm O:-).

Monday, October 18, 2010

Easy Apple Crisp


If you are lucky enough to be swimming in freshly picked fall apples in varieties with names like Ambrosia and Senshu, give this a try... homemade apple crisp with just 5 other ingredients!

Peel, core, and slice five large apples for a 9" x 9" pan. Toss them with sugar (1/2 cup or to taste), flour (2 or 3 tablespoons will do), and cinnamon (to taste). Add a dash of lemon juice or water if you need to thin it out.


The topping is just as simple...  Mix some flour and sugar together and cut in some butter.


Then just spread your streusel topping over the apples and bake for about 30 minutes.


Top with apple ice cream... but that's another post.


Easy Apple Crisp

5-6 apples, peeled, cored, and sliced
1/2 cup sugar
few dashes of cinnamon
2-3 tablespoons flour + 1/2 cup flour
1/2 cup brown sugar
1/4 cup butter

Toss apples with 1/2 cup sugar (or more to taste), 2-3 tablespoons flour, and cinnamon to taste. Use a splash of lemon juice or water if you need to make it coat the apples. Arrange apples in 9" x 9" pan. In a small bowl, combine 1/2 cup flour with 1/2 cup brown sugar, cut in butter. Spread topping over apples. Bake at 375 degrees for 30 to 40 minutes until golden brown and apples are at desired softness.

Thursday, June 17, 2010

Black Tie Mousse Cake

This, quite simply, is chocolate decadence. Olive Garden charges $7 a slice for this. I made the whole cake for about $5. The recipe is not a simple one, but nearly all the reviews I've read from people who have made it concur--it's worth the time.


It begins with a few of my favorite things:


You can make the first two layers the night before, like I did.

Layer one is a chocolate cake. That part actually went together so quickly I forgot to take a picture. You could even use a cake mix, although you would have a lot of leftover batter.

Layer two is a chocolate cheesecake. If you have a favorite recipe for chocolate cheesecake, feel free to use that.


Layer three is an Italian mousse. I used a recipe that involved a mixture of cream cheese and heavy whipping cream, but I've also found recipes that are for a more custard like mousse. I'd like to try it that way next time.


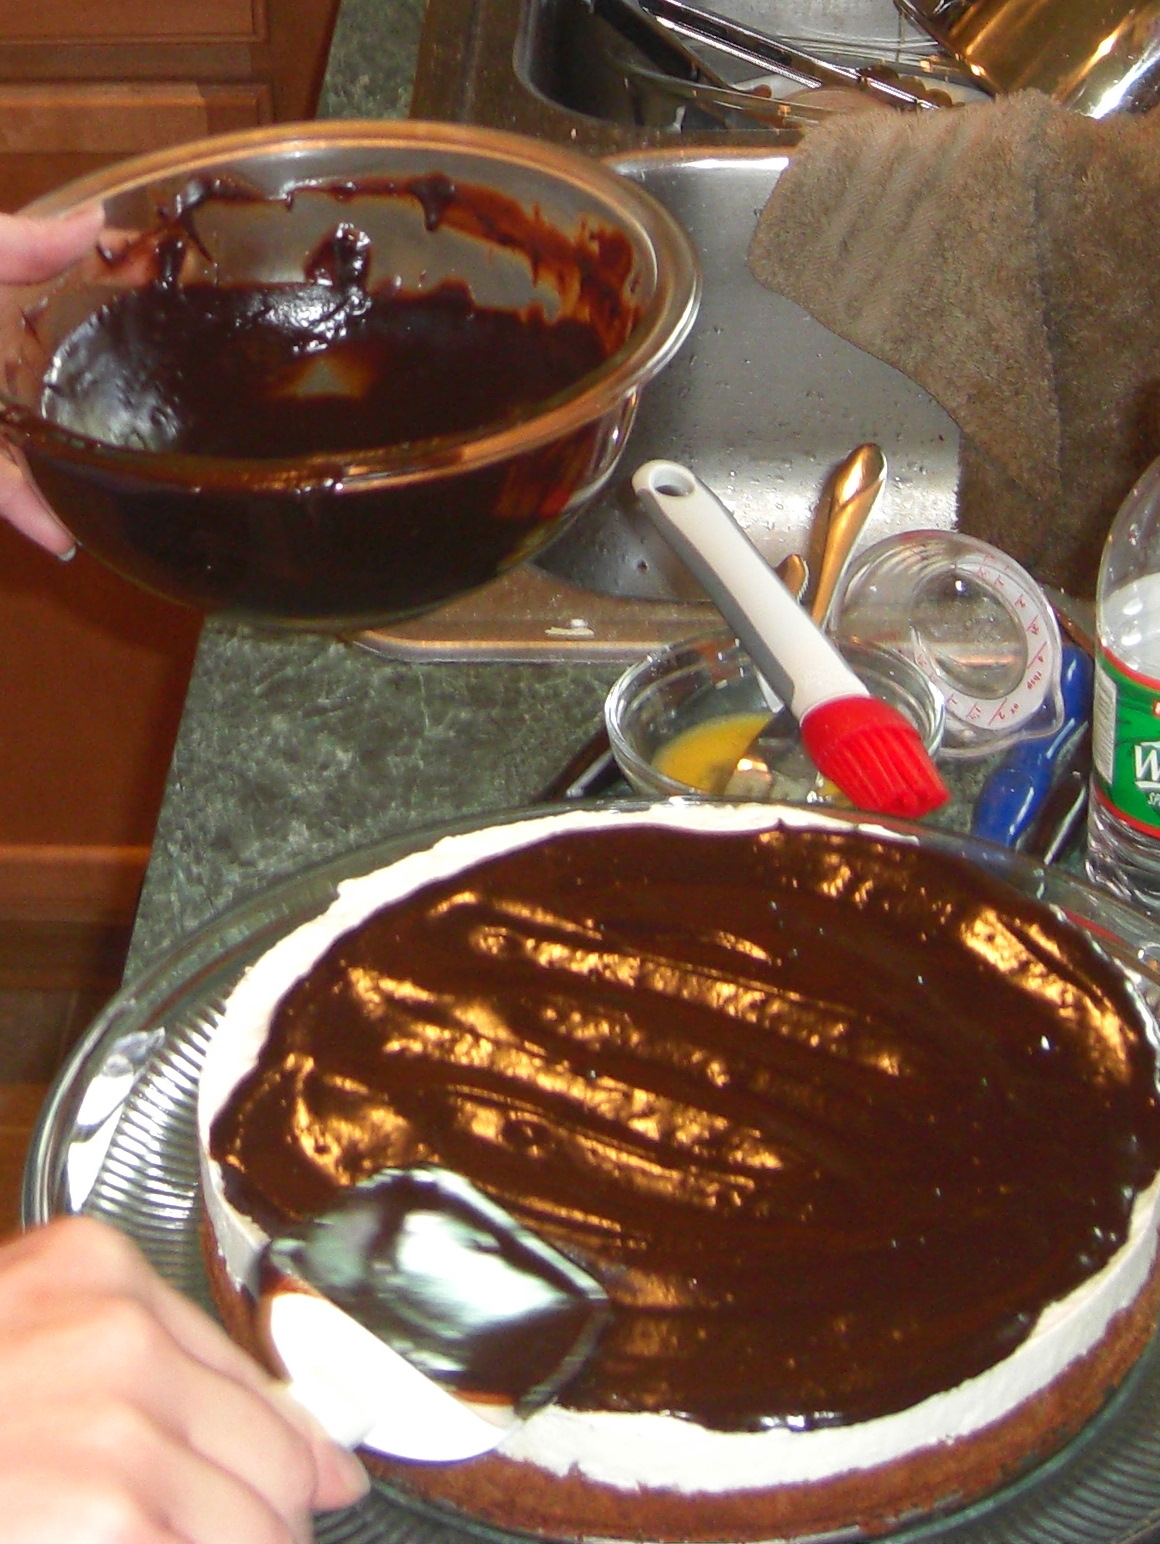
Layer four is a dark chocolate ganache. All I have to say about that is: chocolate and cream were made for each other.

Drizzle a little white chocolate in three circles around the cake and swirl with a toothpick before the ganache sets up.


For the grand finale, take some mini chocolate chips and press them along the edges to create a crust.


Oh, wait, we're not done yet... there's not quite enough chocolate here yet. Let's make a little chocolate whip cream to decorate the edges.


And there you have it. Chocolate. Decadence.


A little Hershey's syrup for presentation if you can handle just one more kind of chocolate:


Olive Garden copycat recipe for


Black Tie Mousse Cake


Layer 1 Chocolate cake "crust":

3 Tablespoons butter, softened
2/3 Cup sugar
2 eggs
1/2 Teaspoon vanilla
1/4 Cup baking cocoa
1/4 Cup flour

Preheat oven to 350. Lightly grease bottom only of a 9 inch springform pan. In medium bowl cream butter and sugar. Add eggs, beating well after each addition; add vanilla and mix well. Add flour and cocoa and mix well to combine. Batter will be stiff. Spread in pan. Set aside.

Layer 2 Baked Chocolate cheesecake:

8 Ounces cream cheese, softened
1/2 Cup ricotta cheese
3/4 Cup sugar
1 Ounce unsweetened chocolate, melted and cooled
2 eggs
1 Tablespoon flour

In large bowl cream cheeses with sugar until smooth. Add small amount to melted chocolate and combine well, add chocolate mixture and beat until well combined. Add eggs and flour and beat well. Smooth over top of cake batter in pan. Bake at 350 for 25-30 minutes or until cheesecake is set in center. Cover with foil during last 10 minutes if needed to prevent over browning. Remove from oven and cool.

Layer 3 Italian mousse:

3/4 c. heavy whipping cream
12 oz marscapone or cream cheese, softened (or 6 oz of each)
1/4 c. sugar
1/2 tsp. vanilla
1 T. cold water
1 T. boiling water
1 tsp. unflavored gelatin

Beat cream until stiff. In separate bowl beat cream cheese with sugar and vanilla until smooth. Combine with cream and fold to combine. In small bowl soften gelatin in cold water for about 1 minute. Pour boiling water over gelatin and stir to dissolve gelatin. Cool five minutes. Fold into cheese mixture until just combined. Spread mixture over baked cheesecake layer and chill well (freezing the cake at this point works well and makes spreading the final layer easier).

Layer 4 Dark chocolate/white chocolate ganache:

9 oz dark chocolate, either chips or bars broken in pieces
3/4 cup heavy whipping cream
1 Tablespoon butter
3 Tablespoons white chocolate chips
1 cup mini chocolate chips

Heat cream and butter over low heat until just boiling (may also microwave). Place dark chocolate chips/pieces in large bowl. Reserve 1 1/2 tablespoons cream mixture. Pour cream mixture over dark chips and let set about 2 minutes, or until chips begin to melt. Stir to combine. Repeat for white chips using reserved cream mixture. Let ganache cool until spreading consistency (set in refrigerator to speed this part up).

Using a sharp knife gently run blade around edge of cake to loosen. Remove cake sides from pan and place bottom with cake on serving plate or stand. Spread frosting over top and sides. Drizzle white chocolate lightly over top. Using a knife or toothpick run it lightly over top to swirl to create desired effect. Press mini chips into frosting on sides until completely coated to create a "crust".

Mousse frosting:

1/2 heavy whipping cream
1/4 c. powdered sugar
1/8 c. baking cocoa
1/8 tsp. vanilla

Combine all ingredients and whip until peaks form. Pipe generously around cake top edge, and center. Chill well and serve. Serves 12-16.