Sunday, August 14, 2011

Clambake!

(Or, as titled by Nathanael "Clambake, Clambake, oh what fun!")

dinner
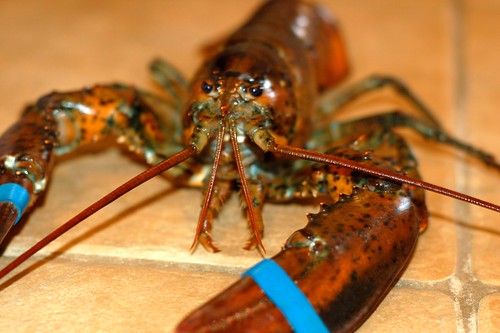
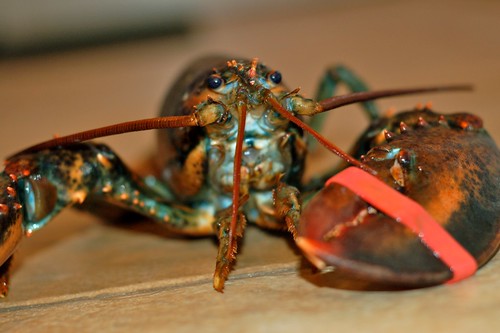
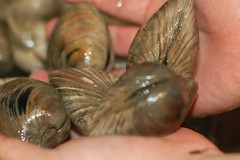
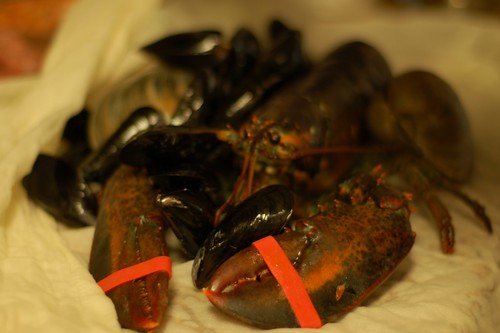
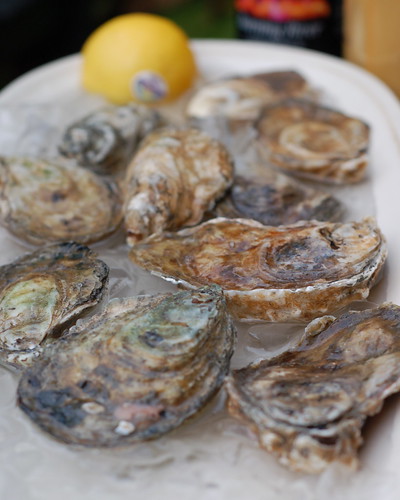
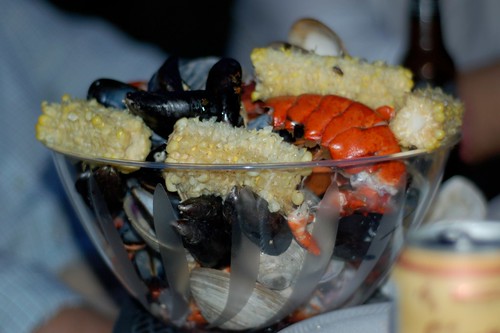
Meet our dinner last night.

And a few of his friends:
red v. blue

kirk and the lobsters

Yesterday was my husband's birthday. Most women take their husbands out to dinner for their birthdays, or maybe stop by a bakery and buy them a nice cake. I, on the other hand, decided it would be fun to have a clambake for my husband's birthday. I mean, what could be more fun than bringing a little bit of beach to my closet-sized kitchen and tiny backyard in the middle of the city?

Not to be deterred by the fact that I had no sand, and couldn't dig a hole in my brick patio backyard, I found an alternate clambake method here. This goes to show that 1) you can find anything on the internet, and 2) there are people just as crazy as me out there!

Here is the pictoral version of our clambake, as documented by Nathanael. (Taken in my windowless kitchen, so they are a little dark!)

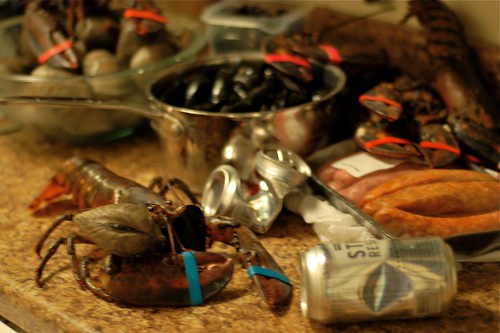
First, find some lobsters, and some friends. Thanks, Kirk, for helping with my mad scheme!

Next, give your lobsters some beer. You want them to die a happy death, after all:
lobster and beerdrunken lobster

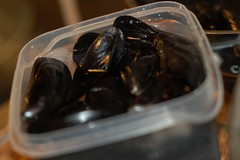
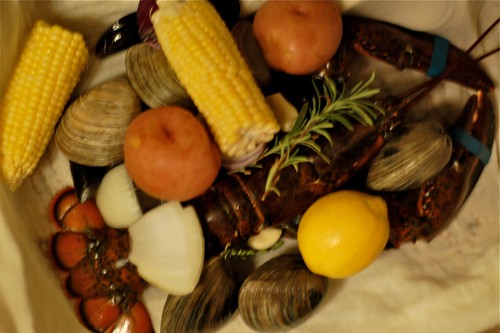
Grab some fellow sea-creatures:
musselsclams

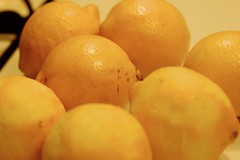
And some vegetables and seasonings:
potatoeslemons

Until your counter is full of ocean-y goodness:
drunken lobster 2

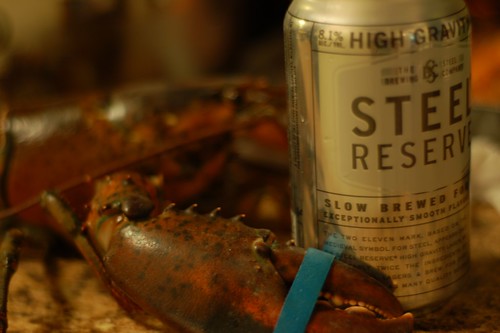
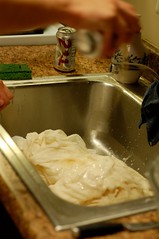
Next, soak some cloths in cheap beer:
soaking cloths

Lay a cloth out on the counter and put a lobster and handful of mussels and clams in the center:
lobster and mussels

Pile on ears of corn, red potatoes, a lemon, some quartered onion, smashed garlic, and some rosemary & thyme:
ingredients 2

Add some italian sausage to the top, and tie up the bundle. Place your bundle on a large sheet of foil and wrap the bundle in seaweed:
adding seaweed

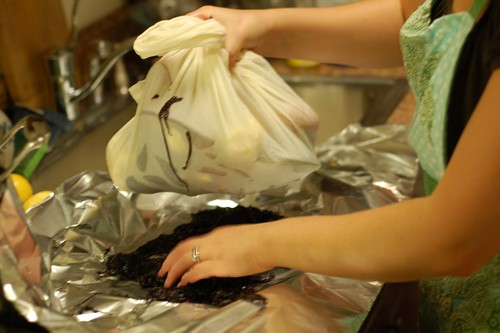
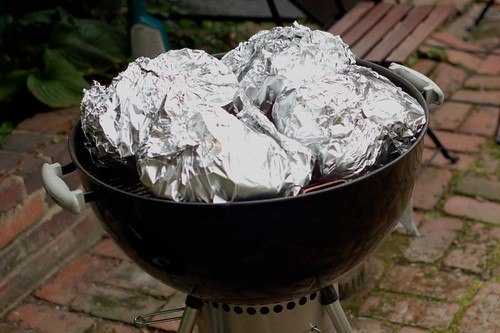
Wrap your bundle securely in foil, and you are ready to grill!
on the grill

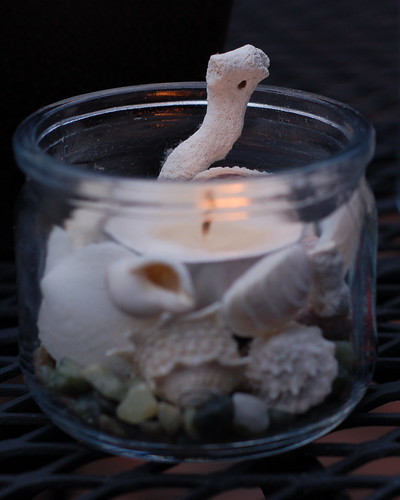
While your clambake is cooking, enjoy a little beach ambiance:
DSC_0144DSC_0146_2

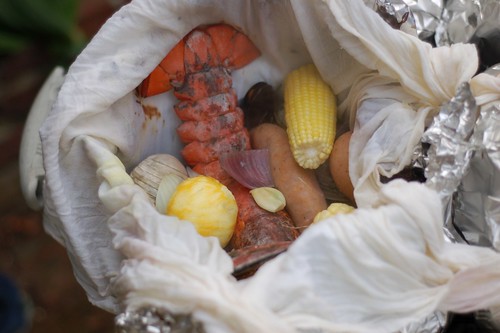
After about an hour, check to see if everything is cooked:
off the grill

Spread out on your picnic table:
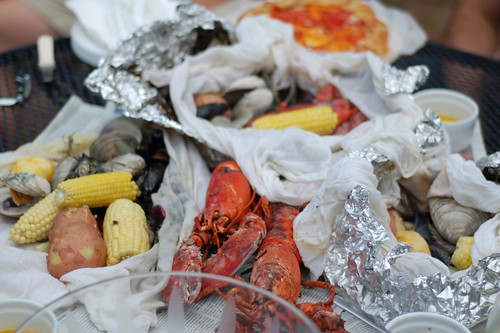
the spread

Enjoy!
the aftermath

We pretty much followed the Washington Post recipe for this clambake. The proportions on that recipe are for giants, however; I used 6 1-lb lobsters, 4 lbs of mussels, 2 dozen clams, 10 ears of corn, 10 sausages, and 16 potatoes. We made 6 packets (plus a 7th with extra with veggies and mussels), and it was plenty to feed 12 people. We used the "steam in packets" method, but put the seaweed between the foil and the flour-sack cloth. This kept everything really moist and had a good flavor, plus was easy clean up! I was unable to find fresh seaweed, so I ended up using dried seaweed from the Chinese market. I soaked it overnight then drained it. We used about 3/4 a bag of charcoal, and let the grill heat for about half an hour before we started. We could get four packets on our grill at a time, so we did them in two shifts. Each packet cooked in about an hour (so the charcoal lasted just barely long enough to finish the second set--it may have helped to add a few more hot coals when we put on the second set). We grilled the sausages at the end (to get them crispy), and grilled a few of the mussels that hadn't quite opened yet. I also didn't prepare the lobster before serving it, like the article said. This is a clambake, people! You spread it out on the table and let everyone dig in! (Also, half the fun is watching your guests figure out how to crack open a lobster ;)). I served everything with drawn butter and chile-thyme spiced butter.

Wednesday, June 1, 2011

Sour Cream-Pecan Coffee Cake

Hello, June! The 100 degree weather outside is a sad reminder that Spring is already over. May flew by so quickly, that I had little time to document my culinary adventures. But here's a quick photo tour:

My first attempt at cake-pops for a co-worker's farewell party:
cake pops
Vanilla cake with dark chocolate and sprinkles. I also made red velvet cake with white chocolate. Tutorial here. The balls are on wooden skewers that I stuck into blocks of styrofoam (recycling!), and surrounded with greenery from my front yard.

End of the World Taco Party!
(judgment) Taco day preparations
I may have made a little much food for this party ... that'll have to be a separate post.


And lots of brunches:
Brunch: I'll be eating that, thanks.Brunch: I didn't know you could do that to eggs.
DSC_0128
Lemon Rolls, Baked Eggs with Spinach and Mushrooms, Sour Cream-Pecan Coffee Cake

The coffee cake comes from a book titled Breakfast and Nine, Tea at Four. Naturally, I bought the book just based off of the title. Actually, I convinced my Dad to buy book for me by promising to make this coffee cake -- the first recipe I saw when I opened the book. I highly recommend making it for your Dad for Fathers Day!

Sour Cream-Pecan Coffee Cake

Ingredients
1/2 cup finely chopped pecans
1 1/2 cups granulated sugar, divided
1 1/2 teaspoons ground cinnamon
3/4 cup softened butter, plus 2 tablespoons diced butter
1/2 cup brown sugar
3 eggs
2 cups all-purpose flour
1 cup whole wheat flour
1 tablespoon baking powder
3/4 teaspoon baking soda
1/2 teaspoon salt
1 1/2 cups sour cream
1 teaspoon vanilla

Instructions
1. Preheat oven to 350 degrees. Grease and flour a 10-inch bundt pan.
2. Combine chopped pecans, 1/2 cup of granulated sugar, and cinnamon. Spoon two tablespoons of this mixture into the greased bundt pan.
3. Beat the butter with an electric mixer on medium speed until cream. Add remaining sugar and brown sugar slowly, mixing until thoroughly combined. Add eggs one at a time, mixing after each addition.
4. In a separate bowl, combine the flours, baking powder, baking soda, and salt.
5. Add the flour mixture to the butter mixture alternately with the sour cream, beginning and ending with the flour mixture. Beat on medium low until thoroughly combined, but be careful not to over-mix. Gently stir in the vanilla.
6. Spoon half the batter into the prepared pan. It'll be very thick and heavy, so it is helpful to drop it by large spoon fulls into the bottom of the pan. You can use a slightly wet spatula to flatten the drops down and push them together. Sprinkle half of the remaining pecan/sugar mixture over the first layer of batter. Repeat with the remaining batter and pecan mixture. Top with diced butter.
7. Bake for 40-50 minutes, until a knife inserted into the center comes out clean (be careful not to stick it into the middle pecan layer, which will be sticky). Cool on a wire rack for 10 minutes. Gently loosen the cake from the sides of the pan and turn out onto a plate. It's easy to lose the top layer of batter in this step, so make sure your cake is pretty loose before you turn it out. But you can always stick it back together, or drizzle a glaze over the top if it falls apart!

Serve warm or at room temperature. 

Sunday, April 3, 2011

Fruit bouquet


I was recently inspired by Edible Arrangements to do a little fruit art of my own. This was a super fun, although time consuming process. A few people have asked about it - so here's the step-by-step.

Start with a flower pot and some floral foam:


For about 50 skewers of fruit, I used a pineapple, a cantaloupe, one green apple, a small bunch of red grapes, and 2 pounds of strawberries.

I cut some cantaloupe wedges to look similar to apple slices and skewered them from the tip into the heart of each slice:


Grapes were stacked three to a skewer:


The pineapple was cut using a flower-shaped cookie cutter. I had to use a small piece of melon rind to secure the pineapple flower so it didn't slide down the skewer. Alternatively, you can cut your pineapple so that the core (which is firmer) is in the center of the flower and skewer it that way:


Place a ball of melon on top after skewering on the pineapple flower. You'll want to use skewers of varying lengths to create the bouquet effect.

Getting started:

The strawberries were easy - just stick a skewer in through the stem until it doesn't quite push out the tip.


Any of the fruit can be dipped in chocolate, but this is more time consuming. I would budget 1 to 2 hours for a regular fruit bouquet and 2-3 hours for one with a lot of chocolate dipped fruit. The ingredients will run around $15 to $20. But they sell for $60 to $100 to if you enjoy the effort, it's a great money-saver! I think this would be a fun project to do with a friend.


Just pack as many in there as the floral foam will hold!


The chocolate dipped version:

To finish off, use some parsley to fill in the gaps and cover up the sticks a little bit.

Monday, March 7, 2011

Oranges, Part II

Lest you think I'm really odd for posting a recipe for candied citrus peel in March (it's a Christmas treat, after all)... There was a reason. It looks like this:

finished, take 1

This particular recipe adventure didn't even start out with a desire to make candied citrus peel -- it started with the cake. You see, this cake has two entire oranges in it. Yes, the WHOLE orange, pith, peel and all. So naturally, I had to see if this really could be done.

And what is a cake without a little decoration? Enter the candied citrus peel.  Now if I could just figure out what to do with all of the naked oranges in my fridge...

The verdict: yes, you really can make a cake out of whole oranges. Despite numerous warnings from other websites that this cake only works if you boil your oranges for hours first, this cake wasn't bitter at all. In fact, it was delicious--rich and buttery, thanks to a few key ingredients:

Round thingsDSC_0099

Three eggs, three sticks of butter, two cups of sugar -- how could that not be good!?


Whole Orange Bundt Cake with Chocolate Ganache Glaze
from Alejandra Ramos of "Always Order Dessert"
Ingredients
2 whole oranges, scrubbed and washed well
1 1/2 cups butter, softened
2 cups granulated white sugar
3 large eggs, room temperature
1 tablespoon pure vanilla extract
3 cups all purpose flour
3 teaspoons baking powder
1 teaspoon Kosher salt

DSC_0090batterfloured bundtready to bake

1. Preheat oven to 350 degrees. Generously grease and flour a Bundt pan and set aside.
2. Quarter the oranges, remove any seeds if not using navel, and put in food processor to puree. Set aside.
3. While the oranges are pureeing, cream the butter and sugar together in the base of an electric mixer for 5 minutes until light and fluffy. Add the eggs, one at a time, waiting until each is fully combined.  Add the orange puree and vanilla extract and mix until combined.
4. In a separate bowl, whisk together the flour, baking powder, and salt. Mix into the wet ingredients gently, just until fully combined.
5. Pour the cake batter into the prepared Bundt pan, spreading so that it is evenly distributed. Bake at 350 for about 60 minutes or until a tester inserted in the cake comes out clean. Let cool in the pan for 15 minutes before inverting onto a wire rack to cool. Cool completely before frosting:

fresh out of the ovenready for frosting!

Chocolate Ganache Glaze

Ingredients (the original recipe called for twice this amount -- I used 3/4 of the original recipe, and had leftovers... I think this amount should be sufficient)
1/2 cup heavy cream
1 cup chocolate chips -- I highly recommend Ghiradelli's 60% Cacao chocolate chips

Put the chocolate chips in a small heat proof bowl. Heat the heavy cream over medium heat just until small bubbles begin to form. Pour the hot cream over the chocolate chips, let sit for 30 seconds, and then and whisk gently until fully melted and combined. Let cool for 15 minutes. Slowly pour the ganache over the cake in a circular motion, allow it it slide drip down the sides. Try to refrain from spreading it around with a spatula, and work quickly. It may take a few tries to get a smooth ganache -- but don't worry, it'll taste so good no one will notice the imperfections!

Top with candied orange peels -- let the ganache set for 15 minutes, then press in the peels gently. Let the glazed cake set for at least an hour before serving. It will keep for 3-5 days under plastic wrap.

frosted, take 2
finished, take 2

Sunday, March 6, 2011

Oranges, Part I

DSC_0010

Candied Orange Peels
(mostly) from David Lebovitz' "The Perfect Scoop"

2 large oranges (or citrus fruit of your choice), washed and scrubbed well
1 cup water
1/2 cup granulated sugar, plus extra for coating
2 teaspoons light corn syrup
pinch of salt

1. Remove strips of orange peel with a knife or vegetable peeler. Cut from pole to pole, creating long straight strips and trying to keep edges as smooth as possible. Gently scrape most of the white pith off of each peel (depending on how think you want your strips to be -- my first batch was too thin and became very brittle. Cut the peel into 1/8 inch match sticks (for curls) or into larger pieces for chunks.
2. Place the peels in a sauce pan and cover with an inch of water. Bring to a boil and simmer gently for 5 minutes. Drain and rinse well. Repeat this process twice more, using fresh water each time. This step helps remove the bitter taste from your orange peels. Some recipes recommend boiling for up to an hour, but I found 15 minutes to be sufficient.
3. Combine 1 cup water, 1/2 cup sugar, corn syrup, and salt in a non-reactive saucepan. Bring to a boil and add the blanched orange peel. Simmer as slowly as possible until the syrup reaches 230 degrees fahrenheit. This should take a good 20-30 minutes, if not longer. Watch the pot very carefully once your thermometer gets above 220. It will take a long time in the 212-220 range, and then reach 230 very quickly. I burnt my first batch because I wasn't watching it closely enough!
4. Let the peels cool in the syrup. You can then either store them in the syrup in the refrigerator, or you can sugar them. To sugar the peels, gently lift them out of the syrup with a fork, letting the excess syrup drain off. Separate the peels and lay them on wax paper. Let them dry out for 30 minutes. Toss the peels in granulated sugar, and let dry for another 30 minutes, or longer if they still feel sticky. Store in the refrigerator for up to 2 months. I also hear these are pretty fantastic dipped in dark chocolate.

DSC_0034DSC_0039DSC_0058DSC_0066


*Notes: I always recommend using a candy thermometer, as it takes the guess work out of cooking. They are very inexpensive and can be obtained at any cooking store, or even Walmart or Target. If you don't have one, however, just cook the peels until most of the syrup has boiled away and the peels look crystalized. The syrup will have just started to look foamy as it boils.

I also don't recommend halving this recipe unless you have a very small saucepan--use the same amount of syrup even if you have one orange. Otherwise there won't be enough syrup to cover the peels and you are in danger of it cooking too fast, or your thermometer not giving an accurate reading.

Apparently there is also great controversy over the *correct* way to make candied fruit. Some recipes claim it takes days to properly candy something, while others think it can be done in just an evening. Since I was experimenting anyway, I decided to try the quick method first, of course. It worked wonderfully! I do plan on trying the longer method at some point, though, for a proper scientific comparison. And of course, I'll have to test out a few more kinds of fruit... ;).  Have you tried candying anything? How did it turn out?

DSC_0002